Hello friends

April 17, 2014

IMG_3899It has been a long, cold winter, but despite yesterday’s snowfall, Spring has arrived at Henbogle in the form of… you guessed it, baby chicks!

On Friday, a few more chicks will join these five cuties. I am looking forward to the fun of new chicks again!

There has been a lot going on at Henbogle despite my silence, but I miss blogging and all my blogger buddies, so I’m making a concerted effort to get back to regular posting. Soon I’ll share some exciting news, but for now I need to get off to work!

Tomatoes at last

September 1, 2013

IMG_3613

Lest my radio silence be mistaken for lack of gardening, I give you:  Tomato Season.

IMG_3627

I’ve got 26 pints of roasted tomato sauce canned, with more in the works.

IMG_3612My squash are sadly dying from powdery mildew, but we’ve enjoyed some zucchini and flying Saucer squash, and have shredded and frozen some, too, for use this winter.  The Diva and Socrates cukes have been divine.  So wish I’d managed a second planting of cukes.

As always, there is much to do and too little time here at Henbogle.  Sigh.

IMG_3622

Here’s a glimpse of one of the garden’s less demanding residents.  He’s been singing to us for much of the summer.

Sad news

August 27, 2013

I am saddened today to learn of the passing of Leslie Land, a fellow gardener, cook, and blogger.  I will miss her.  Her blog can be found here, and her obituary here.


The garden room

July 21, 2013

Behold a painting miracle:

IMG_3368

I totally LOVE the paint color, it looks even better than I expected.  It is Sherwin Williams Independent Gold in a flat finish.   We primed the walls first in white, then painted the green.  We painted the trim in West Highland White, after priming first with pigmented shellac, then 2 coats of primer.  Unfortunately, the floor has some water damage; we know what our next floor refinishing project will be, but in the meantime, we’ll add an area rug.

IMG_3366

The chair is slipcovered with a sheet that picks up a color from the simple curtains I made.  When I met him, Dan had that little green lamp on the marble-topped commode, and the barely discernible turquoise blue dishes are a gift from the room’s frequent occupant, my twin-sister-of-another-mother (mothers who are distantly related but don’t know it), Holly.

IMG_3341

We still need to paint the door, but it will do for now.  The ceiling is a simple white and we replaced the light with the fixture we swapped for an LED light at the entrance to the dining room.

IMG_3367

I sewed a curtain for the closet, I’d like to add a door, but the futon makes that challenging.

IMG_3371

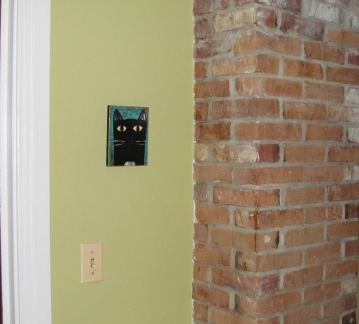
Finally, today I added the purrfect touch.

Updating plank ceilings

July 20, 2013

IMG_3285We had one bedroom in our house we had never painted.  Yep, sadly, it was still as it was on the day we closed in December, 2000.  The room, directly above the living room, overlooks the backyard and features the exposed brick chimney for the woodstove.  Leaving the chimney exposed adds a rustic touch, but more importantly, when the woodstove is burning, the chimney throws a little heat, adding some extra warmth to our cold New England house.  There was a problem, though.  The chimney had a leak, and the leak damaged, and continued to damage, the drywall ceiling.

We’d tried several different ways to address the leak.  New flashing, our roofer added more asphalt sealer around the chimney roof joint, a mason came and replaced the first course of bricks, all to no avail.  Finally, in spring 2011, we had Supaflu come and retrofit a new chimney liner, and that stopped the leak.  At last we could IMG_3289paint.  Someday.

Fast forward to the present, and taa daa, we are finally painting.  First, we had to come to some agreement about what to do about the plank ceilings.  The bedrooms in our 1 1/2 story Cape are all tucked under the eaves of the house, with cozy sloped ceilings.  The two bedrooms in the main part of the house had knotty pine tongue and groove planking on the slopped portion of the ceilings, which had been left unfinished since installation.  Over the years, it had darkened IMG_3293considerably, and on one wall, we had some water stains from the chimney leak.  I felt like it made the rooms dark and cramped, but Dan liked the natural wood.  We hemmed and hawed, and finally Dan agreed to try whitewashing the planking with white stain.  For the paint, we picked out a lighter shade of yellowy-green called Independent Gold.

Wow, what a difference.  A simple coat of white oil-based stain lifted the ceilings and made the room appear significantly larger and brighter.  First we treated the water stains with Oxyclean, which lightened the stains considerably, then sanded using our random orbital sander attached to the shop vacuum, to remove dust and dirt and open the pores of the wood.  Finally, we gave the planks a thorough vacuuming to remove any residual dust.  Then, fans in the window for ventilation, we stained.  The old wood just drank up the stain, we did not even have to wipe it off.  The stain needed a couple of days to thoroughly dry, then we finished with 1 coat of polyurethane in a satin finish.  IMG_3322

It should have a second coat, but I moved on to other tasks, namely, removing the hideous wall paper and border.  Ugh.  I understand at some levels the desire to wallpaper rooms, but after removing it from walls over a number of years, I can’t foresee a day when I will decide to add wallpaper.  But I digress.  Once the wallpaper was off, we got to the fun part, painting.  More on that in part deux.  In the meantime, I’ll leave you a sneak peak of the new color.

Retrofitting lighting — adding LEDs

July 19, 2013

IMG_3282We have had some seriously ugly and dated lighting in our dining room.  It was so ugly, that two of the lamps tried to run away to hide.  One got as far as the laundry room, but the other only made it a few feet away from the mother fixture.  Operated by a different switch.  On another circuit.  Why?  I don’t know.

With a new paint job, and reconfiguring this room a little (more on that later) the time had IMG_3318come to replace the lighting.  Which is harder than it should be — lighting seems to fall into 2 categories, inexpensive and unattractive, or beautiful and wildly expensive.  Naturally, I have an eye for the wildly expensive.

IMG_3330We thought we’d replace the runaway light with a recessed can light, to minimize the appearance.  Either that, or make it go away all together.  Wandering the aisles of Home Depot, we came across a knowledgeable employee, who introduced us to what we eventually selected — a retrofit LED can light.  This light is an engineering marvel.  It is a shallow fixture, designed for supremely easy installation into a standard 4-inch junction box.  No cutting a bigger hole and all the rigmarole that comes with retrofitting a can light.  The light is generated by a computer chip via the four tiny yellow diodes seen on the open lamp in the photo on the right.  The computer chip is beneath, protected by the lamp housing.  The plastic light diffusing lens snaps back into place following installation.  It is amazingly bright.

Of course, in our situation it wasn’t quite that easy (because it never is).  The junction boxes in our dining room were 3-inch boxes, sigh.  This required IMG_3361swapping them out for modern 4-inch boxes, not difficult, just another step in what was supposed to be an easy task.  Ah well, that’s how it usually goes.  While Dan replaced the box, I painted the lights to match the new ceiling color.   Soon enough the runaway was replaced.  The IMG_3360other lamp, by the doors to the dining room/kitchen and the laundry room, is also in, but we still need to do a little ceiling repair to smooth out the ceiling where the old light fixture was. That fixture was not my favorite style, but OK, just a little big for the space, and several times suffered close calls with destruction when we were moving furniture, lumber, etc.  So that light moved upstairs to a bedroom which needed an update.

Finally, we replaced the main light fixture.  This was the difficult one, we looked and looked but could not find something we liked for less than $350, way over budget.  Finally, Dan had a brilliant idea.  We selected a basic boob light, and around it, we’ll stencil a subtle mariner’s compass.  The boob light will become the center of the compass and will look far less boobish.  We both love the idea.  So for now, the boob light is installed, sans stencil.  I hope we’ll get to it soon.

Overall, I’m really pleased.  The LED lights use far, far less energy than conventional incandescent bulbs.  The can lights really are not very noticeable in the ceiling, yet we have light when we need it.  The light quality is not the same, even with warm LED bulbs — it is a little too reminiscent of the dreadful compact fluorescent bulbs of a few years ago that made us all look ill, but for lights that are primarily used for a purpose rather than general lighting, they work.  I would highly recommend the LED fixture for anyone looking to replace traditional lighting with can lights, these are terrific.

A waiting game

July 18, 2013

Picture 38Holy heck it’s hot!  First a cool damps spring, then an overnight switch into hot & humid have marked our summer here at Henbogle.  The very wet June has led to a bumper crop if mosquitoes and biting flies, here, IMG_3296and those, combined with the  heat and humidity during the day, are making gardening exceptionally unpleasant.

The garden grows, though a lot of things got off to a very slow start.  Still, the shallots look good, the potatoes are blossoming, there are green tomatoes on the vine, and the spring broccoli and cauliflower was good.  The broccoli, though, even my beloved Piracicaba, has been slow to give me side shoots.

The snap peas came and went in a flash, and I’ve had some destructive nibbling of my lettuce crop, so garden eating hasn’t been super to date.  It is a IMG_3301good thing I’ve got fabulous nearby farms and farm markets.  Late blight has been confirmed in Western Massachusetts, sigh, meaning it is more than likely we’ll have it here sooner than later. I’ll hope I can get some new IMG_3297potatoes and fried green tomatoes if nothing else.

Of course the weeds are flourishing with the early plentiful rain and hit weather/absent weeder.  Sigh.  Dan Man and I watered and weeded a bit last night, until the biting flies drove me inside.  The watering brought on a nice thundershower, so the other gardens we did not water got some needed rain, and we got a lovely light show.  No such luck that the storm would usher in cooler air, we have more of the same until Sunday.

At least inside we have air conditioning on the first floor, so we’ve been IMG_3305keeping busy with painting and house projects.  I’ve got some dear old friends coming to visit next week, so Henbogle is being buffed and waxed to a glow.  More on that next.

Painted, polyed and waiting

July 5, 2013

We painted, (walls are Sherwin Williams Sassy Green, ceiling Jersey Cream) and we finished the floor with Bona Polyurethane in a Satin finish.  We took the radiator covers off, and while they were off decided to paint them.

IMG_3257

In a happy accident, the green wall color is a perfect match to the color of the grape leaves on the arbor outside the big window when the sun is shining through them.

IMG_3260

Now we wait for the floor to cure.  Saturday evening we can move furniture back into the room.  I can hardly wait.  In the meantime, we are sanding and painting the doors to the bathroom, basement and front entry.

IMG_3262

It looks pretty good considering this is the first time we’ve ever done a floor.

Project creep

June 28, 2013

IMG_3157It all started with deciding to paint the living room and the remaining unpainted upstairs bedroom.  We also wanted to remove some built-in shelving, so of course, we would need IMG_3193quite a bit of drywall repair, including a pretty challenging repair by the chimney.  Dan and I are not skilled at drywall work, we even put a beadboard ceiling in our laundry room to avoid putting up a drywall ceiling.  We decided to seek professional help, and asked around and found a great contractor, Jamie, who amazingly could fit us in right away.

We’ve always disliked the textured ceiling in the living room, and it needed a lot of re-taping and repairing, so we opted to have Jamie put up a new drywall ceiling, and repair the many other little problem areas, like our half finished repair from a leak in our upstairs bath.  Jamie’s work was amazing, he could put joint compound up so smoothly it barely needed sanding.  IMG_3198

Once we dragged out all of the furniture from the living room, Dan commented that the floor looks awful, we should sand and refinish it while the room is empty.  Suddenly, the scope of the project expanded dramatically.  Dan was right, much IMG_3210easier to do it now while the house is a wreck, rather than make it a wreck next year and have to do all that dust containment again!  We rented a floor sander, and in one long, long day, sanded the entire floor.

The rental place didn’t have an orbital sander, so we opted for a pad sander as the drum sanders were too scary.  We started with a 36 grit paper, but soon switched to 20 grit, or what felt like macadam.  It worked to sand off the remaining finish in the low traffic areas.  We then went to 36, then 60, 80, and finished with 100 grit. IMG_3203 If you can rent an orbital sander, that it the way to go, but we made the pad sander work, vacuuming frequently and changing the paper often.

It looks amazing.  It still has plenty of “patina” from years of living, which is OK with us.  There are some dents and scratches and dark spots from who knows what, but we love it.  If only we could leave it as us, it even feels good underfoot.  Alas, we need to protect it from daily living, so we will be re-finishing with a water-based low sheen polyurethane floor finish.

Unfortunately, we seem to have entered monsoon season here in Maine, and after a spectacular week last week, we have had humid, gray days since Monday, with rain, humidity and overcast skies predicted through Independence Day.   Yuk.  not great weather for polyurethane.  For now, we’ve covered the floor in plastic and have moved on to painting the ceiling and walls.  We’ll even (I hope) add polyurethane to the never-finished section of the wainscoting.  Maybe by the time we finish that, the sun will return?  I can hope.

A quick peek at the garden

June 26, 2013

IMG_3177I snapped some photos early in the day Monday and Tuesday.  The garden is looking good, except for a couple of weedy patches that need major remediation.

The shallots are looking good despite the late planting and their being nearly over grown by weeds.  The first IMG_31782 years I grew them I planted them in the fall for overwintering (2010 and 2011).  After being away all summer, the fall was crazy and I did not get them planted, so Dan helped me get the shallots in on May 6 in hopes of at the very least having a fall seed crop.  They don’t look quite as lush as they did in June 2011, but I’m happy, especially as they have regrouped nicely after a thorough Dan-man weeding, followed by a good watering, treatment of fish emulsion, and mulching with grass clippings.

The potatoes, planted last Monday, are up and after a rain shower are even bigger than pictured.  More rain IMG_3180showers are predicted today, after which I’ll fill them in with some more soil to encourage more taters.  My cukes, zucchini and Futsu Black winter squash are up.  I was fortunate to discover some Johnny’s Diva cukes at a local nursery, and purchased some when my Socrates cukes, in the back of the first tomato cage cuke trellis, were slow to sprout.  Since then, two of the three Socrates cukes have sprouted but I’ll leave them just in case.  I have room for an additional cuke trellis for a later planting if the striped cucumber beetles are bad.

IMG_3182I also discovered some Flying Saucers summer squash at the same nursery that had the Diva cukes, and purchased them as I had forgotten to buy seed.  I love their nutty flavor and funky shape.  I’ve got the squashes all covered with floating row cover to deter the striped cucumber beetles and squash bugs.  I’ll pull the cover when the plants begin to blossom.  I’d like to make some kind of cover for the trellised cukes, but haven’t managed that yet, and given the extensive home improvement project list, it probably won’t happen this year.  Ah well.

Today it is very humid and sticky, as it was yesterday, ugh.  Perfect weather for sanding our living room floor.  NOT, but oh well.  I’m working on the edges today but the majority of the sanding is done and looks great.  When and if we have a break from the humidity, we’ll put on some polyurethane, and until then, we take our shoes off at the door.